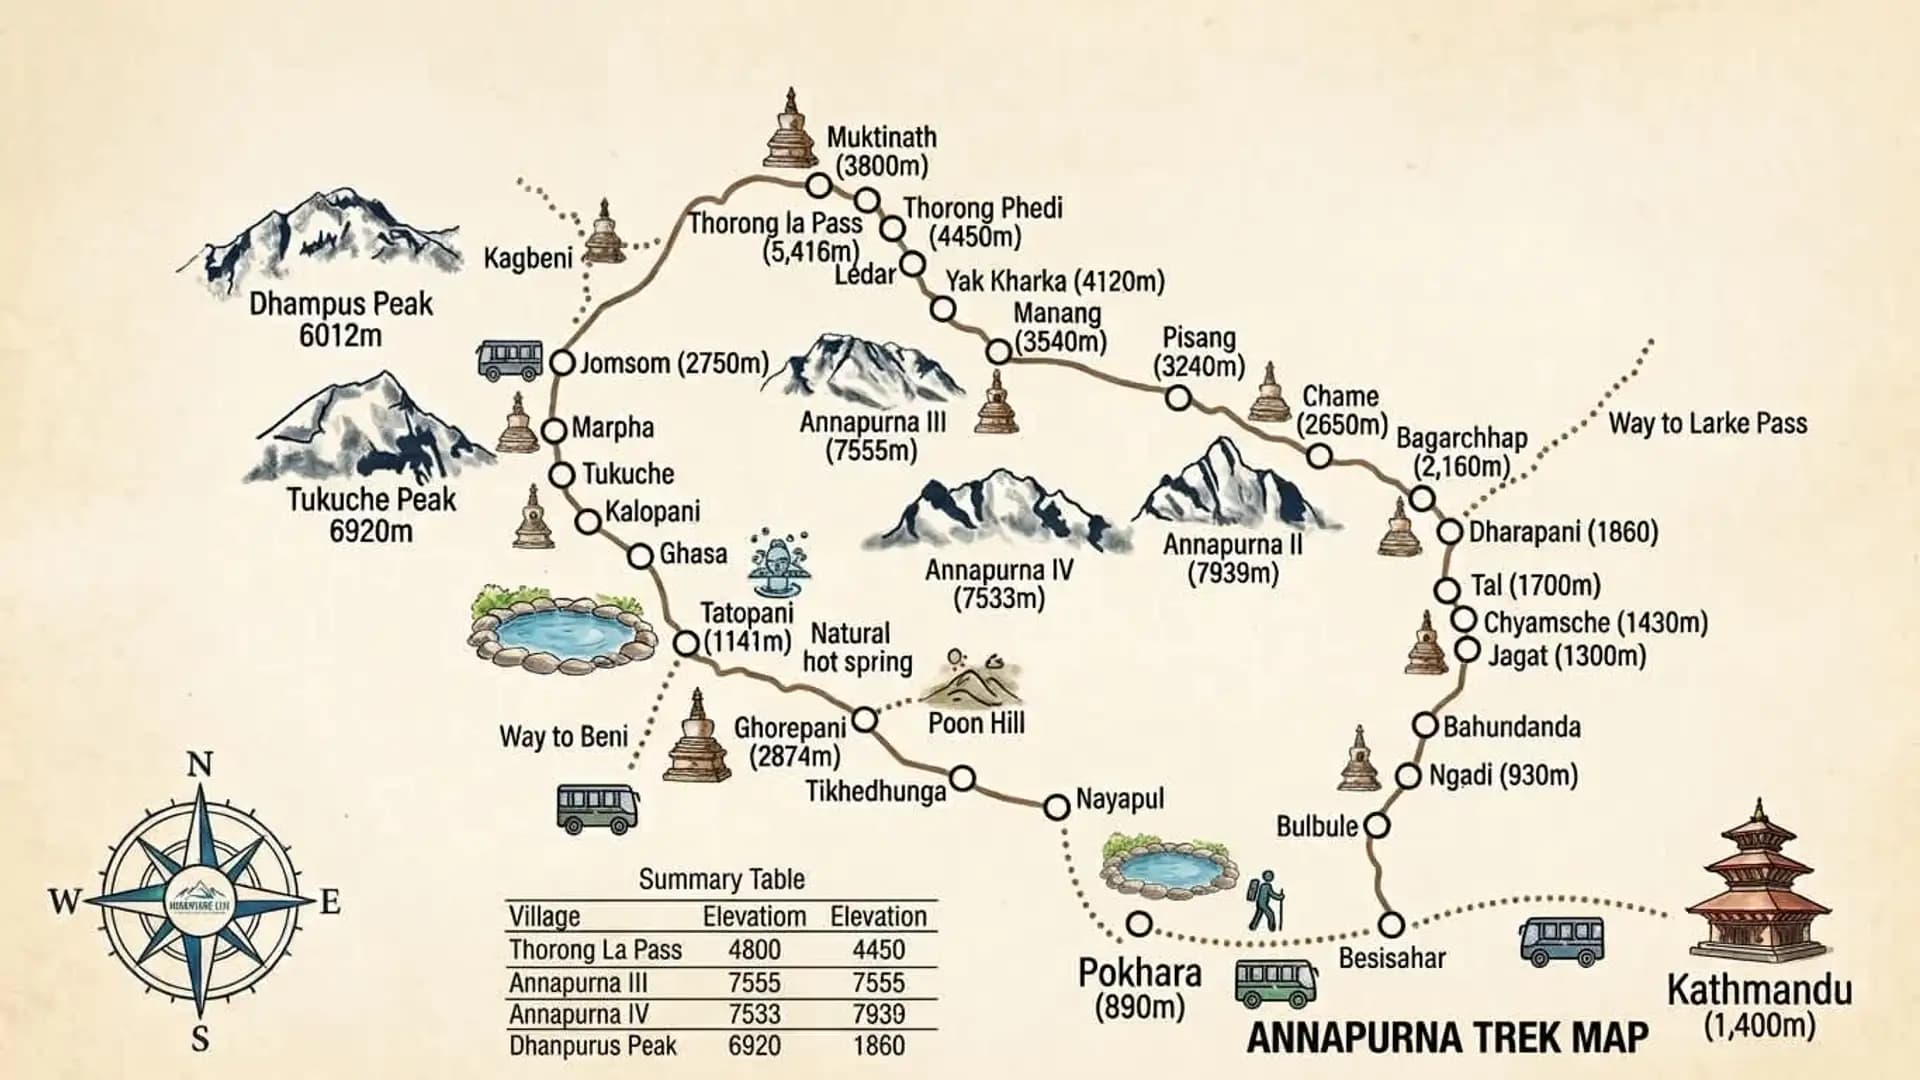
Annapurna Circuit Trek Map: Complete Route Guide for 2026
Introduction to Annapurna Circuit Trek Map
Unlike a there-and-back trek where the map is essentially a single line to memorize, the Annapurna Circuit's map is a genuine loop — one that starts in one river valley, climbs over a 5,416-meter pass, and comes down an entirely different valley on the other side, through a different culture, a different climate, and often a different mode of transport.
Understanding this map isn't just useful for orientation; it's central to understanding why the trek is planned the way it is, why it's walked in one particular direction almost universally, and why a single mountain pass functions as the trek's one genuine point of failure.
This guide is built as a complete, written map of the Annapurna Circuit — every major waypoint in order, the distance and elevation between them, where roads have shortened the traditional route, where side trips like Tilicho Lake and Nar Phu Valley branch off and rejoin, where permit checkpoints sit, and how the whole loop connects back to its starting point.
Every figure here has been checked against multiple current route descriptions, and where sources present slightly different numbers for a given village's elevation or the distance between two points — which happens genuinely often on a route this long and remote — that variation is presented honestly as a range rather than papered over.
Quick Facts: The Annapurna Circuit Map at a Glance
Fact | Detail |
|---|---|
Route shape | A loop around the Annapurna Massif, not a there-and-back trek |
Starting point (traditional) | Besisahar, ~760-800m |
Highest point | Thorong La Pass, 5,416m (17,769ft) |
Ending point (typical) | Pokhara, via Jomsom flight or the Ghorepani/Nayapul overland route |
Total distance | Roughly 160-230km on the classic full route, or roughly 100-130km on a modern jeep-supported itinerary |
Typical duration | 12-21 days depending on itinerary style |
Direction most commonly walked | Anticlockwise (Besisahar → Manang → Thorong La → Muktinath → Jomsom) |
Two river valleys crossed | Marsyangdi Valley (east side, ascent) and Kali Gandaki Valley (west side, descent) |
Key side trips branching off the main map | Tilicho Lake (near Manang), Nar Phu Valley (near Koto/Dharapani), Upper Mustang (via Kagbeni) |
Primary acclimatization hub | Manang, 3,540m |
Why This Trek's Map Is Different From a Standard Trekking Route
Most trekking routes in Nepal — Annapurna Base Camp, Everest Base Camp, Ghorepani Poon Hill — are fundamentally there-and-back journeys: you walk to a destination and largely retrace your steps home.
The Annapurna Circuit's map works completely differently. It's a genuine loop, meaning you walk into one valley, cross over the top of the entire mountain massif via a single high pass, and descend into a completely different valley on the far side, eventually looping back toward your starting region from a different direction entirely.
This has a few direct, practical consequences worth understanding before diving into the detailed waypoint map:
There's no "turning back" option once you're deep into the route. Unlike a there-and-back trek where retreat is always straightforward, once you're past Manang and committed to the pass, going back the way you came is a much longer undertaking than simply continuing over Thorong La.
The pass is a single point of failure. Because there's only one route over the massif on this trek, if Thorong La is closed by snow, there's no alternative path around — the entire circuit effectively can't be completed as planned.
The trek passes through genuinely different cultures and climates on each side. The eastern (Marsyangdi) side is characterized by Gurung and Manangi communities with a mix of Hindu and Buddhist influence; the western (Kali Gandaki/Mustang) side moves into Thakali and Tibetan Buddhist territory, with Muktinath serving as a major pilgrimage site sacred to both traditions.
The Complete Route Map: Section by Section
Section 1: Besisahar to Chame — The Lower Approach
Waypoint | Elevation | Approx. distance from previous point |
|---|---|---|
Besisahar (trailhead) | ~760-800m | — |
Bahundanda | ~1,310m | ~7-8km |
Jagat | ~1,300m | ~10km |
Dharapani | ~1,860m | ~12km |
Chame | 2,670m | ~15km |
This lower section follows the Marsyangdi River north through waterfalls, narrow gorges, suspension bridges, and dense forest. It's also the section most affected by road construction — a motor road now reaches Chame and, in places, beyond, meaning many modern itineraries cover some or all of this stretch by jeep rather than on foot, saving several days compared to the traditional walking route.
Section 2: Chame to Manang — Into the High Valley
Waypoint | Elevation | Approx. distance from previous point |
|---|---|---|
Chame | 2,670m | — |
Upper Pisang | ~3,300m (alternate: Lower Pisang ~3,200m) | ~13-14km |
Ngawal (if taking the high route) | ~3,660m | Variable, alternate path |
Braga (Braka) | ~3,470m | ~15km from Pisang |
Manang | 3,540m | ~19-20km from Pisang |
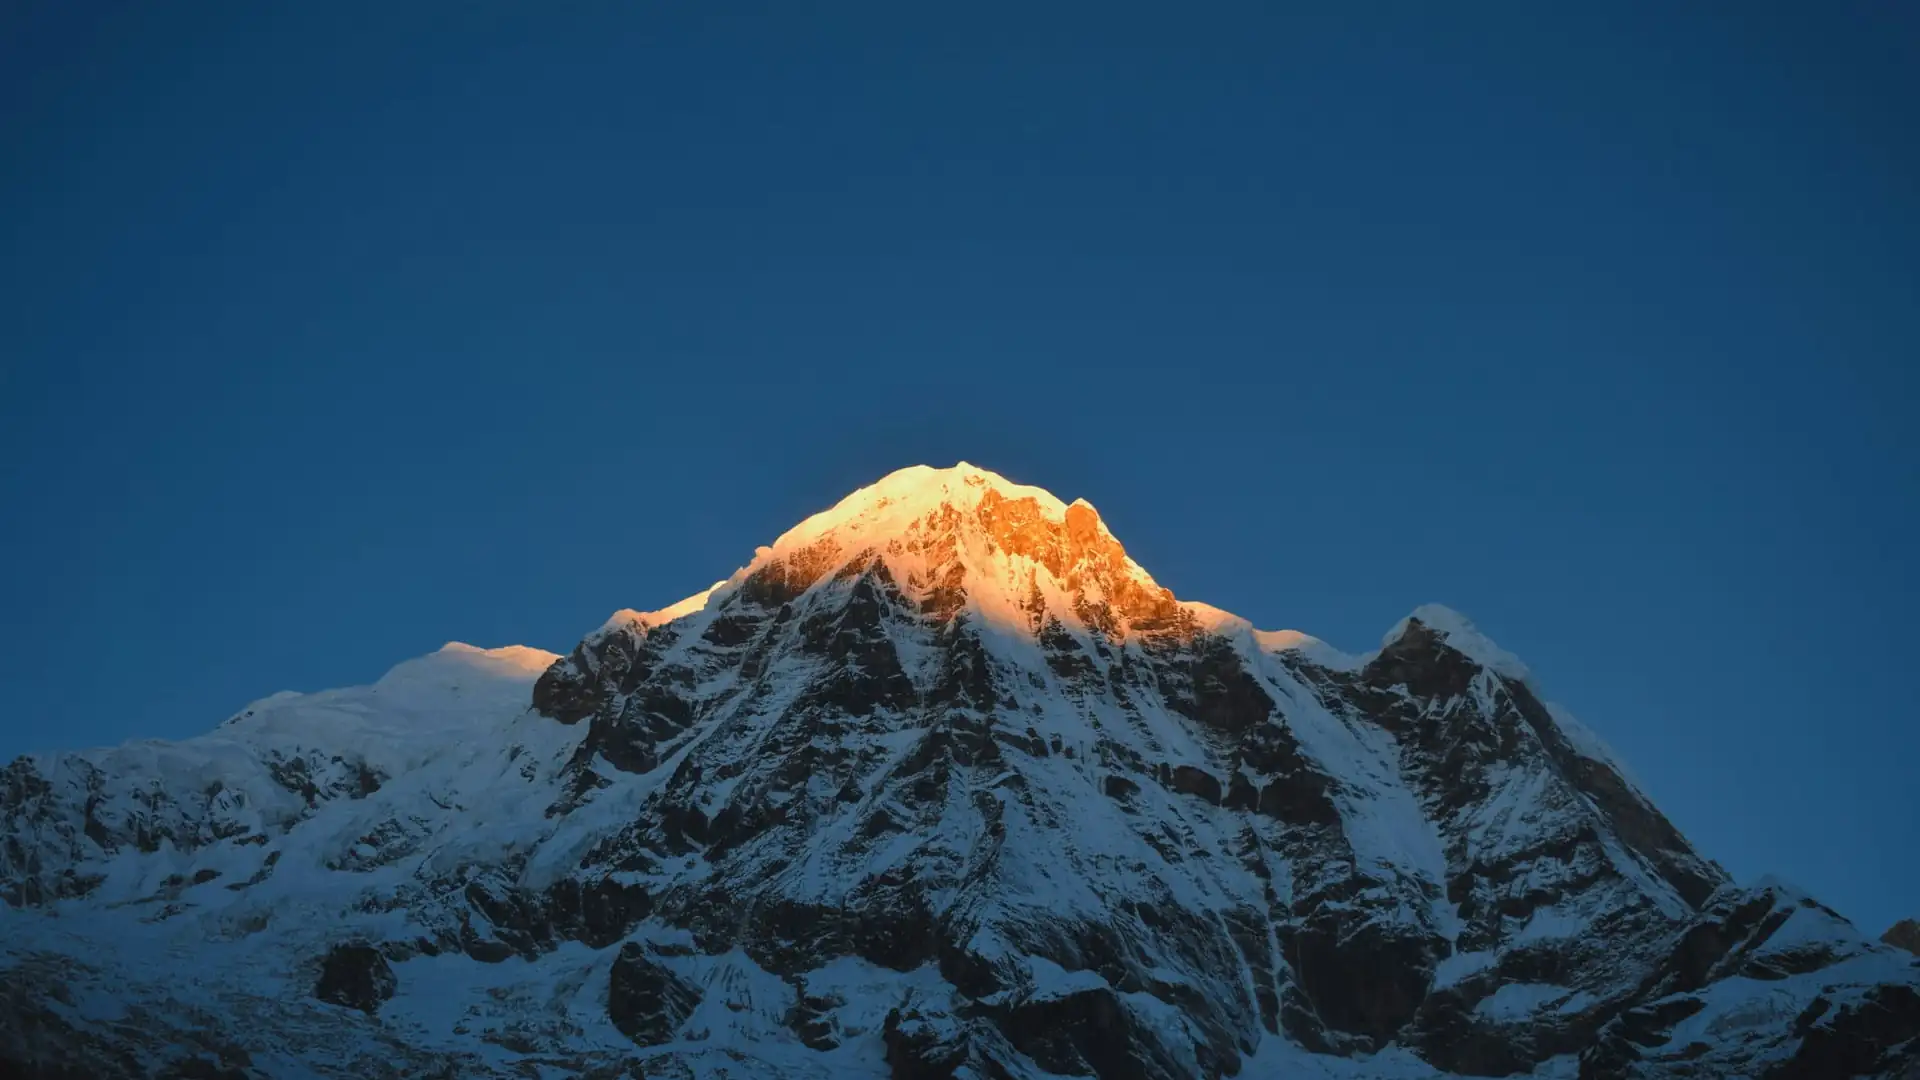
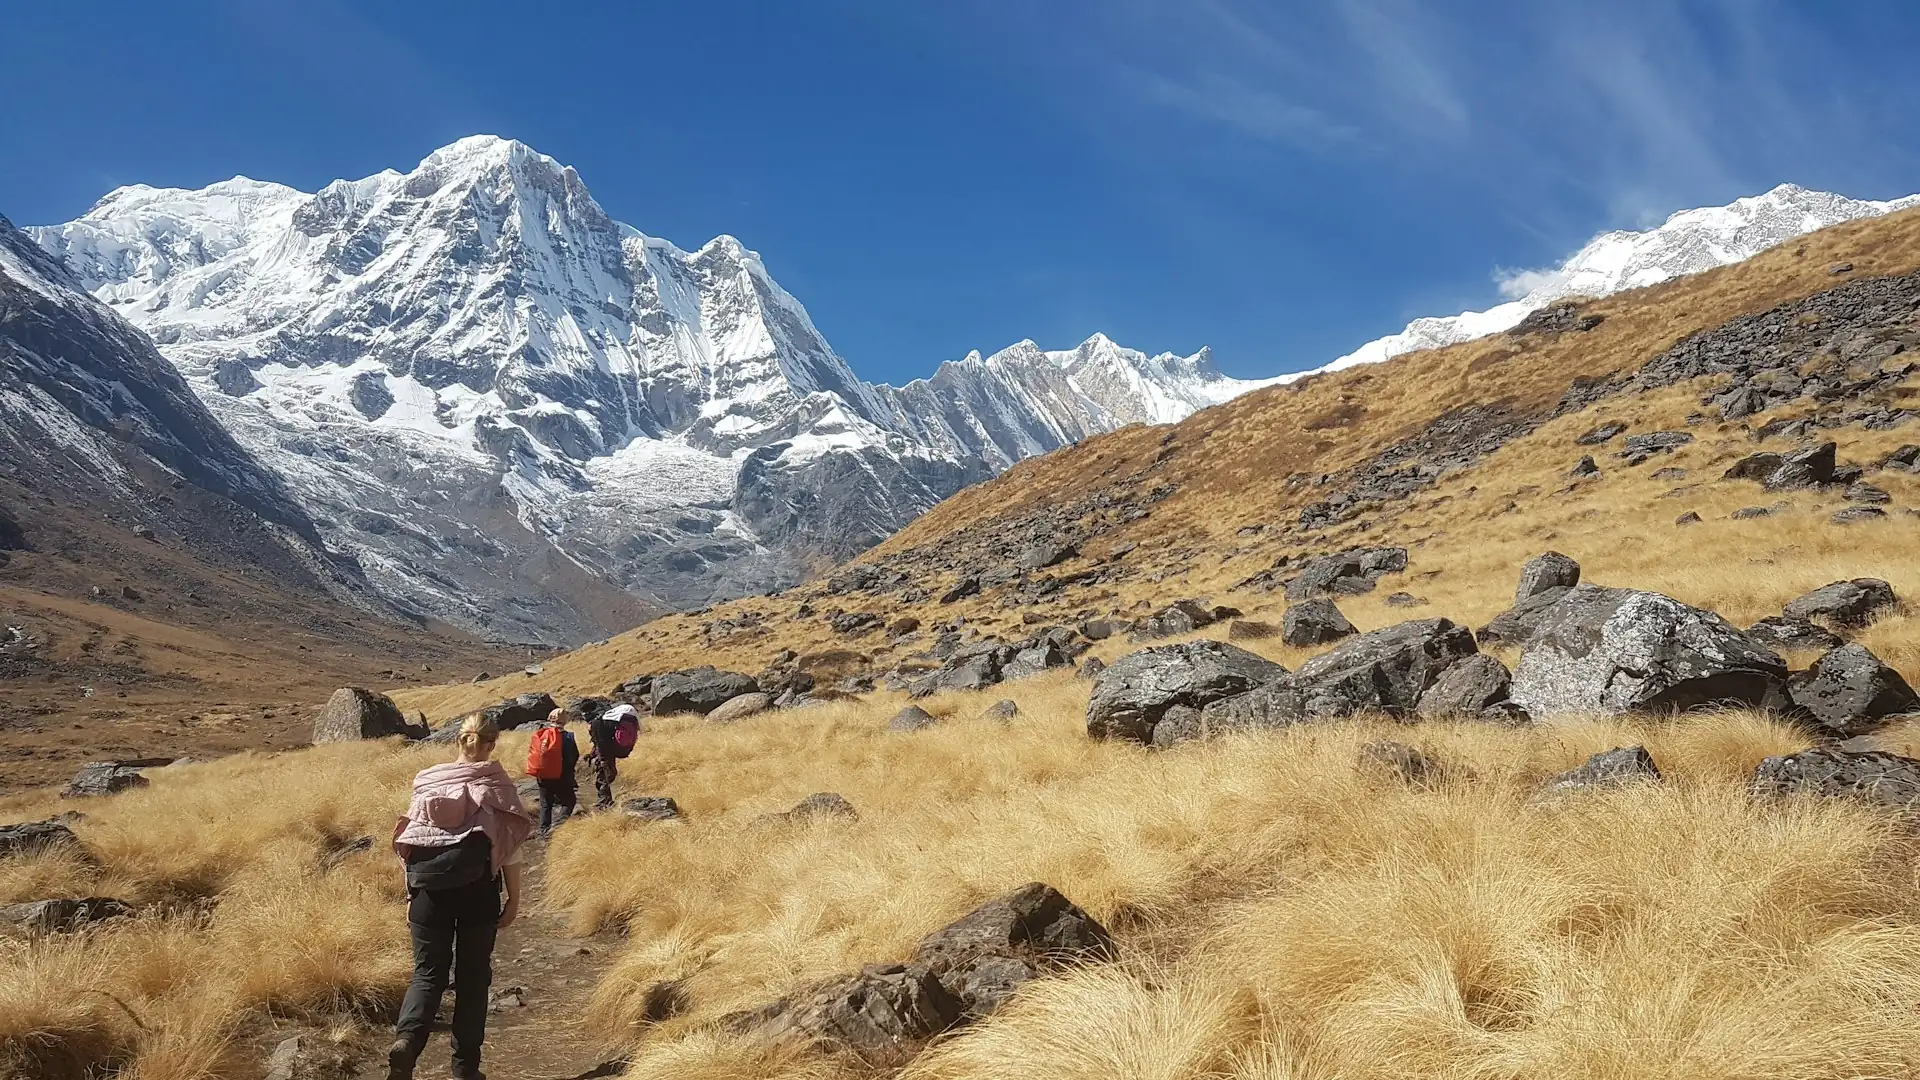
This is where the trek visibly shifts character — forest thins, the valley opens up, and the scale of the surrounding peaks (Annapurna II, Annapurna IV, Pisang Peak) becomes genuinely apparent for the first time.
Section 3: Manang to Thorong La — The High-Altitude Push
Waypoint | Elevation | Approx. distance from previous point |
|---|---|---|
Manang (acclimatization stop) | 3,540m | — |
Yak Kharka | Roughly 4,010-4,120m (sources vary) | ~10km |
Letdar (intermediate stop on some itineraries) | ~4,250m | ~4-5km |
Thorong Phedi | Roughly 4,420-4,540m (sources vary) | ~5-6km |
Thorong High Camp | Roughly 4,880-4,925m | ~1-2km above Phedi |
Thorong La Pass | 5,416m (17,769ft) | ~5km from Phedi / ~3.5km from High Camp |
This is the map's most demanding stretch by every measure — the steepest sustained elevation gain, the thinnest air, and the section where the vast majority of altitude-related caution is concentrated.
Section 4: Thorong La to Tatopani — The Rapid Descent
Waypoint | Elevation | Approx. distance from previous point |
|---|---|---|
Thorong La Pass | 5,416m | — |
Muktinath | ~3,760-3,800m | ~15-16km, a descent of roughly 1,600m |
Jomsom | ~2,700-2,743m | ~19-22km |
Kagbeni (side detour toward Upper Mustang) | ~2,800m | Short detour from the Jomsom road |
Marpha | ~2,670m | ~18km south of Jomsom |
Ghasa | ~2,010m | Further south along the Kali Gandaki |
Tatopani | ~1,190-1,200m | Further descent, often covered partly by road |
The transformation on this side of the map is dramatic — dry, windswept, high-altitude Mustang terrain gives way, over just a couple of days, to greener, warmer valley conditions as you descend the Kali Gandaki Gorge, one of the deepest river gorges in the world, running directly between Annapurna I (8,091m) to the east and Dhaulagiri I (8,167m) to the west.
Section 5 (Optional): Tatopani to Pokhara via Ghorepani
Waypoint | Elevation | Approx. distance from previous point |
|---|---|---|
Tatopani | ~1,190-1,200m | — |
Ghorepani | ~2,860-2,875m | ~10-12km, a re-ascent |
Poon Hill (sunrise side trip) | 3,210m | Short pre-dawn climb from Ghorepani |
Tadapani / Ghandruk (continuing toward Nayapul) | ~2,610m / ~1,950m | Variable |
Nayapul (final trailhead) | 1,070m | Final descent |
Not every itinerary includes this closing loop — many trekkers instead fly directly from Jomsom back to Pokhara, skipping several days of additional walking. Including it adds the popular Poon Hill sunrise viewpoint and a gentler, more gradual final descent, at the cost of additional trekking days.
Alternative Exit: The Jomsom Flight
Rather than continuing on foot from Jomsom through Tatopani and Ghorepani, many trekkers choose to fly directly from Jomsom back to Pokhara.
This flight typically costs roughly USD 150-170 one way for foreign nationals and takes a fraction of the time the overland route would require — though Jomsom's airstrip is notoriously wind-affected, and flights are frequently delayed or canceled due to weather, particularly as the day progresses (flights generally operate in the early morning before winds pick up). Building buffer days into your schedule if relying on this flight is genuinely important rather than optional.
Side Trip Maps: Where They Branch Off and Rejoin
Tilicho Lake
Waypoint | Elevation | Notes |
|---|---|---|
Manang (branch-off point) | 3,540m | Where the side trip diverges from the main trunk trail |
Khangsar | ~3,730m | Last permanent village before the high route; passes the historic Tare Gumba monastery |
Tilicho Base Camp | 4,140m | Overnight stop before the final push to the lake |
Tilicho Lake | 4,919-4,920m | One of the highest lakes of its size in the world; highest point of this side trip |
Shree Kharka | 4,050m | Return-leg overnight stop |
Rejoin point | Near Yak Kharka | Reconnects with the main Circuit trail heading toward Thorong Phedi |
Adding Tilicho Lake typically extends the overall Circuit itinerary by roughly 2 days, with the insertion point falling naturally during the Manang acclimatization stage (around days 6-7 of a standard itinerary).
The lake sits beneath Tilicho Peak (7,134m), first seen by Europeans in 1950 by members of the same French expedition that made the historic first ascent of Annapurna I.
Nar Phu Valley
Waypoint | Elevation | Notes |
|---|---|---|
Jagat / Koto (branch-off point) | ~1,300m / ~2,610m | Restricted-area permit checkpoint at Koto |
Meta | Variable | Transition into the narrow Phu valley |
Phu Gaon | ~4,250m | Remote, walled village near the Tibet border zone |
Nar | ~4,100m | Second remote village, culturally distinct from lower Annapurna villages |
Kang La Pass | ~5,322m | Highest point on this side route |
Rejoin point | Near Ngawal/Manang | Reconnects with the classic Circuit trail |
Because Nar Phu requires a restricted-area permit and, in most cases, a minimum group size, it's typically combined with a full Circuit itinerary rather than trekked standalone — combined itineraries commonly run 12-16 days total.
Upper Mustang Connection
Upper Mustang branches off the Circuit's western descent via Kagbeni, just past Muktinath. It's technically a separate restricted trekking region rather than a formal part of the Circuit itself, requiring its own significant restricted-area permit (historically around USD 500 for a 10-day period), but it's commonly combined with a Circuit itinerary by trekkers with additional time, given how close the two routes sit to each other on the map.
The Full Junction Map: Where Everything Connects
Junction point | What connects here |
|---|---|
Besisahar | Traditional trailhead for the entire Circuit |
Dharapani/Koto | Main Circuit trail and the Nar Phu Valley branch-off point |
Chame | Where road access typically ends and more traditional trekking terrain begins on most itineraries |
Pisang | Split point between the Upper Pisang (scenic, higher) and Lower Pisang (easier, lower) route options |
Manang | Main acclimatization hub; branch-off point for Tilicho Lake and (via Ngawal) the return leg of Nar Phu Valley |
Thorong Phedi/High Camp | Final staging points before the single mandatory pass crossing |
Muktinath | Western-side arrival point after the pass; gateway to Kagbeni and Upper Mustang |
Jomsom | Road and air hub; where many trekkers choose to fly out rather than continue overland |
Tatopani | Lowest point on the western descent; junction with the optional Ghorepani/Poon Hill closing loop |
Nayapul | Final trailhead if completing the full overland route, shared with Annapurna Base Camp and Poon Hill trek networks |
Roads on the Map: What's Changed From the Classic Route
This is one of the most important practical updates to understand if you're referencing an older guidebook or map of this trek. The mountain road from Besisahar toward Chame follows the Marsyangdi River through Ngadi, Bahundanda, Syange, Jagat, and Dharapani, a stretch that used to be walked over 3-4 days but is now commonly covered by jeep on modern itineraries.
Similarly, the descent from Muktinath through Jomsom toward Tatopani is now largely road-accessible, and many trekkers cover some or all of this stretch by vehicle rather than on foot.
This has genuinely reshaped the map's practical "walked distance" — the classic 160-230km figure reflects the traditional full route, while a modern itinerary using road transport on these lower sections often involves walking closer to 100-130km, concentrated on the higher, more scenic, and more remote sections of the trail where roads haven't reached.
A Note for Purists
Trekkers who specifically want the traditional, fully-on-foot experience can still walk these lower sections rather than driving them — most operators, including experienced local guides, can arrange this on request, routing onto older trekking trails that run parallel to or above the motor road where such alternatives still exist, avoiding dust and traffic while preserving the walking experience.
Permit Checkpoints Mapped
Checkpoint | Location on the route | Permit checked |
|---|---|---|
Besisahar | Trailhead | ACAP |
Koto | Nar Phu Valley branch-off | ACAP plus restricted-area permit |
Manang | Circuit trunk trail / Tilicho branch point | ACAP |
Kagbeni | Upper Mustang gateway | ACAP plus separate Upper Mustang restricted-area permit |
Jomsom | Western descent hub | ACAP |
The two core permits — the Annapurna Conservation Area Permit (ACAP, roughly USD 22-30) and the TIMS card (roughly USD 15-17) — cover the standard Circuit route in full. Nar Phu Valley, Tilicho Lake, and Upper Mustang each require additional permits beyond these two, reflecting their status as either restricted areas or designated special zones.
Direction of Travel: Why the Map Is Almost Always Walked Anticlockwise
The Circuit can technically be walked in either direction, but the overwhelming majority of trekkers — and virtually every guided itinerary — go anticlockwise, meaning starting from Besisahar in the east, climbing gradually through Chame and Manang, crossing Thorong La from the Manang side toward Muktinath, and descending through Jomsom on the western side.
This directional choice is fundamentally about the shape of the elevation map: going anticlockwise means climbing to the 5,416-meter pass gradually, over many days of steady, incremental altitude gain, with a proper acclimatization stop at Manang built into the route along the way.
Going clockwise (starting from Muktinath and climbing to the pass from the western side) would mean a much faster, steeper elevation gain to reach the same 5,416 meters, without the same acclimatization runway — a pattern that significantly increases altitude sickness risk and is rarely offered by reputable trekking operators as a result.
Elevation Profile Overlaid on the Map
Understanding where the map climbs steeply versus gradually helps make sense of daily itinerary pacing.
Map section | Elevation character |
|---|---|
Besisahar to Chame | Gradual, steady climb through subtropical and temperate forest |
Chame to Manang | Steeper, sustained gain begins in earnest |
Manang to Thorong Phedi/High Camp | The steepest, most sustained high-altitude stretch on the entire map |
Thorong La crossing | A single explosive day — up to 530m further gain, then roughly 1,600m of descent |
Muktinath to Tatopani | Rapid, sustained descent over several days |
Tatopani to Ghorepani (optional) | A gentle re-ascent to close out the trip |
Cumulative elevation gain and loss across the full route — accounting for the trail's constant rising and falling, not just the simple difference between lowest and highest points — has been documented at roughly 4,100 meters or more, a figure that captures just how much vertical movement this particular map actually involves beyond its headline high point.
Distance Summary Table: The Full Loop
Segment | Approx. distance |
|---|---|
Besisahar to Chame (often partly by road) | ~35-40km |
Chame to Manang | ~35-40km |
Manang to Thorong La (via Phedi/High Camp) | ~20-25km |
Thorong La to Muktinath | ~15-16km |
Muktinath to Jomsom | ~19-22km |
Jomsom to Tatopani (often partly by road) | ~65-70km |
Tatopani to Nayapul via Ghorepani (optional) | ~35-40km |
Total (full overland route, optional loop included) | Roughly 160-230km, depending on exact start/end points and how much is walked vs. driven |
How the Map Shapes a Standard Itinerary
Here's how a representative 13-16 day itinerary maps against these waypoints, tying the geography directly to daily planning.
Day | Route segment | Approx. elevation |
|---|---|---|
1 | Kathmandu/Pokhara → Besisahar → Chame (often combined via jeep + short trek) | Gain to 2,670m |
2 | Chame → Pisang | Gain of roughly 530-630m |
3 | Pisang → Manang (via Upper Pisang/Ngawal or Lower Pisang route) | Gain of roughly 240-340m |
4 | Acclimatization day in Manang | No net overnight elevation change |
5 | Manang → Yak Kharka | Gain of roughly 470-580m |
6 | Yak Kharka → Thorong Phedi or High Camp | Gain of roughly 200-800m |
7 | Thorong Phedi/High Camp → Thorong La (5,416m) → Muktinath | Net gain to 5,416m, then a steep ~1,600m descent |
8 | Muktinath → Jomsom | Descent of roughly 1,050-1,080m |
9 | Jomsom → Tatopani (often by road) | Descent to ~1,190-1,200m |
10-11 | Tatopani → Ghorepani → Poon Hill (optional) | Re-ascent to ~2,860-3,210m |
12-13 | Descent to Pokhara via Ghandruk/Nayapul, or fly out from Jomsom instead | Descent to ~800-1,070m |
Reading a Physical or Digital Map of This Route
What to Look For on Any Map You Use
Solid lines vs. dashed lines — most current maps distinguish motorable roads from foot trails, an important distinction given how much road construction has reshaped the lower sections of this specific route
Side-trip branches — Tilicho Lake and Nar Phu Valley should appear as distinct branch lines off the main trunk trail, not as separate loops, since you leave and rejoin the same core route
Elevation profile chart — a good map includes a cross-section elevation diagram beneath the route itself, since altitude, not horizontal distance, is what actually determines difficulty and pacing on this trek
Permit checkpoint markers — showing where ACAP, restricted-area, and Upper Mustang permits are physically checked
Digital Tools
Offline GPS apps such as Maps.me or Gaia GPS are widely used by trekkers on this route and generally have solid trail data for the main Circuit path, though newer or more remote branches like Nar Phu Valley can be less completely mapped. Battery life and cold-weather performance are worth considering, particularly for the high-altitude stretch above Manang.
Physical Maps
Printed topographic maps, produced by outlets like Nepa Maps or Himalayan MapHouse, remain a reliable backup and are widely available in Kathmandu and Pokhara before departure — a genuinely sensible redundancy given how batteries and phone signal both become unreliable at altitude.
The Most Reliable "Map" of All
A licensed guide — mandatory for foreign trekkers on this route since 2023 — effectively replaces the need to navigate independently, and brings something no static map can offer: current, real-time knowledge of trail conditions, recent snow at the pass, or a temporarily closed section, which is particularly valuable given how much this specific route's practical map (road sections, snow-affected stretches) can shift from season to season and even week to week.
Emergency and Safety Resources Along the Map
The Himalayan Rescue Association maintains a post in Manang, providing altitude sickness information and emergency guidance during the trekking season — worth knowing about specifically because Manang marks the last major settlement before the trail pushes into its highest, most remote, and most demanding stretch toward the pass.
Beyond Manang, emergency response options thin out considerably until reaching Muktinath and Jomsom on the far side, which is a meaningful consideration when planning pacing and acclimatization through the high-altitude middle section of the map.
Seasonal Effects on the Map's Passability
Season | Effect on the route |
|---|---|
Spring (March-May) | Generally passable and stable, though late-season snow can occasionally linger near the pass |
Monsoon (June-August) | Generally avoided; poor visibility and wet, unstable conditions affect the highest, most exposed sections |
Autumn (September-November) | The most reliable season for crossing Thorong La — stable weather, minimal snow risk across the whole map |
Winter (December-February) | Genuine risk of Thorong La becoming snow-blocked, since there's no alternative route around the massif |
Because the pass is the map's single point of failure, checking current conditions before any winter or shoulder-season departure is standard, sensible practice — a snow-blocked Thorong La doesn't just delay the trek, it potentially prevents completing the loop as planned at all.
Comparing This Map to Other Annapurna Region Routes
Trek | Route shape | Relationship to the Circuit map |
|---|---|---|
There-and-back, into the Annapurna Sanctuary | Shares the Nayapul trailhead if the Circuit's optional Ghorepani/Nayapul closing loop is used, but otherwise a separate route entirely | |
Shorter loop through lower villages | Can overlap with the Circuit's optional final section via Ghorepani, if that closing loop is chosen over the Jomsom flight | |
Separate ridge trek, different trailhead entirely (Kande/Phedi) | No overlap with the Circuit's map | |
A separate, neighboring circuit-style trek east of the Annapurna Massif | Geographically adjacent but not connected on foot to the Annapurna Circuit map |
Practical Map-Reading Tips for This Specific Trek
Understand that "distance remaining" isn't the whole story. A day covering 15km on the flat lower valley feels completely different from a 15km day climbing toward Thorong Phedi — always cross-reference distance against the elevation profile, not just the horizontal figure.
Know your Phedi-vs-High-Camp decision before you reach it. The map shows both as viable staging points before the pass, but the trade-off between a lower, gentler night (Phedi) and a shorter, faster summit push the next morning (High Camp) is worth deciding in advance with your guide based on how your acclimatization is going.
Recognize which sections are currently road vs. trail. Given how much construction has reshaped the lower Besisahar-to-Chame and Muktinath-to-Tatopani stretches, a map more than a few years old may show trail sections that are now partially or fully drivable.
Treat the pass as the map's one non-negotiable checkpoint. Every alternate routing decision (Upper vs. Lower Pisang, whether to add Tilicho Lake, whether to include Nar Phu) still funnels back toward the same single crossing point at Thorong La.
Planning Your Circuit Route with a Local Nepal Operator
A written map like this one provides the structural framework, but the actual, current version of this route — which sections are currently drivable, whether this week's snow near High Camp affects the Phedi-vs-High-Camp decision, whether Thorong La is currently open — requires real-time, on-the-ground knowledge that a static guide simply can't provide on its own.
This is where working with an experienced, locally based operator like Adventure Life Nepal adds genuine value beyond the map itself: guides who walk this specific route regularly, who track current pass and trail conditions directly, and who can make informed, real-time decisions about routing (Upper vs. Lower Pisang, whether to add a side trip like Tilicho Lake, whether an extra acclimatization day is warranted before the pass) based on how your specific group is doing, not a generic template.
Whether you're planning the classic full loop, a shortened jeep-supported version, or an extended itinerary with Tilicho Lake or Nar Phu Valley woven in, having that local judgment layered onto the map above is what actually turns route planning into a well-executed trek.
Frequently Asked Questions about Annapurna Circuit Trek Map
1. Is the Annapurna Circuit a loop or a there-and-back trek?
It's a genuine loop — you walk into the Marsyangdi Valley on the eastern side, cross Thorong La Pass, and descend through the Kali Gandaki Valley on the western side, rather than retracing your steps.
2. What is the highest point on the Annapurna Circuit map?
Thorong La Pass, at 5,416 meters (17,769 feet), the trek's single highest point and the only route across the Annapurna Massif on this trek.
3. Which direction should I walk the Circuit — clockwise or anticlockwise?
Anticlockwise (Besisahar to Manang to Thorong La to Muktinath) is overwhelmingly preferred and used by nearly all guided itineraries, since it allows a gradual, extended elevation gain toward the pass with a proper acclimatization stop at Manang.
4. Where does the Tilicho Lake side trip branch off from the main map?
Near Manang, via Khangsar — the standard insertion point is during the Manang acclimatization stage, adding roughly 2 extra days before rejoining the main trail near Yak Kharka.
5. Do I need a different permit for Nar Phu Valley or Upper Mustang?
Yes, both require additional restricted-area permits beyond the standard ACAP and TIMS that cover the core Circuit route.
6. How accurate are older maps of this trek, given road construction?
Less reliable than they used to be — significant sections of the traditional walking route, particularly Besisahar to Chame and Muktinath to Tatopani, are now partially or fully road-accessible, meaning an older map may show trail-only sections that can now be covered by jeep.
7. What's the total distance of the Annapurna Circuit?
Roughly 160-230km on the classic full route, or roughly 100-130km if using jeep transport on the lower, road-accessible sections, which most modern itineraries do to some extent.
8. Should I fly from Jomsom or walk the full loop back to Pokhara?
Both are common. Flying from Jomsom (roughly USD 150-170 one way) saves several days but is weather-dependent and prone to delays; walking the full loop via Ghorepani adds the popular Poon Hill sunrise viewpoint and a gentler overall descent.
9. Where do I get permits checked along the route?
Primarily at Besisahar (trailhead), Koto (Nar Phu branch-off), Manang, and Kagbeni/Jomsom (Upper Mustang gateway and western descent).
10. Is there an alternative route if Thorong La is closed by snow?
No — there is no alternative route around the Annapurna massif, which is why the pass functions as the trek's single point of failure and why checking current conditions before winter or shoulder-season departures matters.
11. What's the difference between the Upper Pisang and Lower Pisang route options?
Upper Pisang reaches a slightly higher elevation (~3,300m vs ~3,200m) and offers better mountain views, at the cost of more effort — both routes rejoin at or near Manang.
12. Where does the Manang acclimatization day fit into the map?
At 3,540 meters, positioned close to the altitude where AMS risk becomes genuinely relevant, making it a well-placed rest day before the trek pushes into its higher, more demanding stretch toward Thorong La.
13. Can I combine the Annapurna Circuit map with Annapurna Base Camp?
Not directly on foot as a single continuous route — they share the general Nayapul/Ghorepani area if you choose the Circuit's optional closing loop, but they're otherwise distinct treks typically booked as separate trips.
14. What's the best way to get a current, accurate map of this route?
A combination of an offline GPS app (for real-time positioning), a current printed topographic map as backup, and — most reliably — a licensed local guide who has current, firsthand knowledge of trail and pass conditions, since this is one of the routes in Nepal where the practical map genuinely shifts from season to season.
Final Thoughts on Annapurna Circuit Trek Map
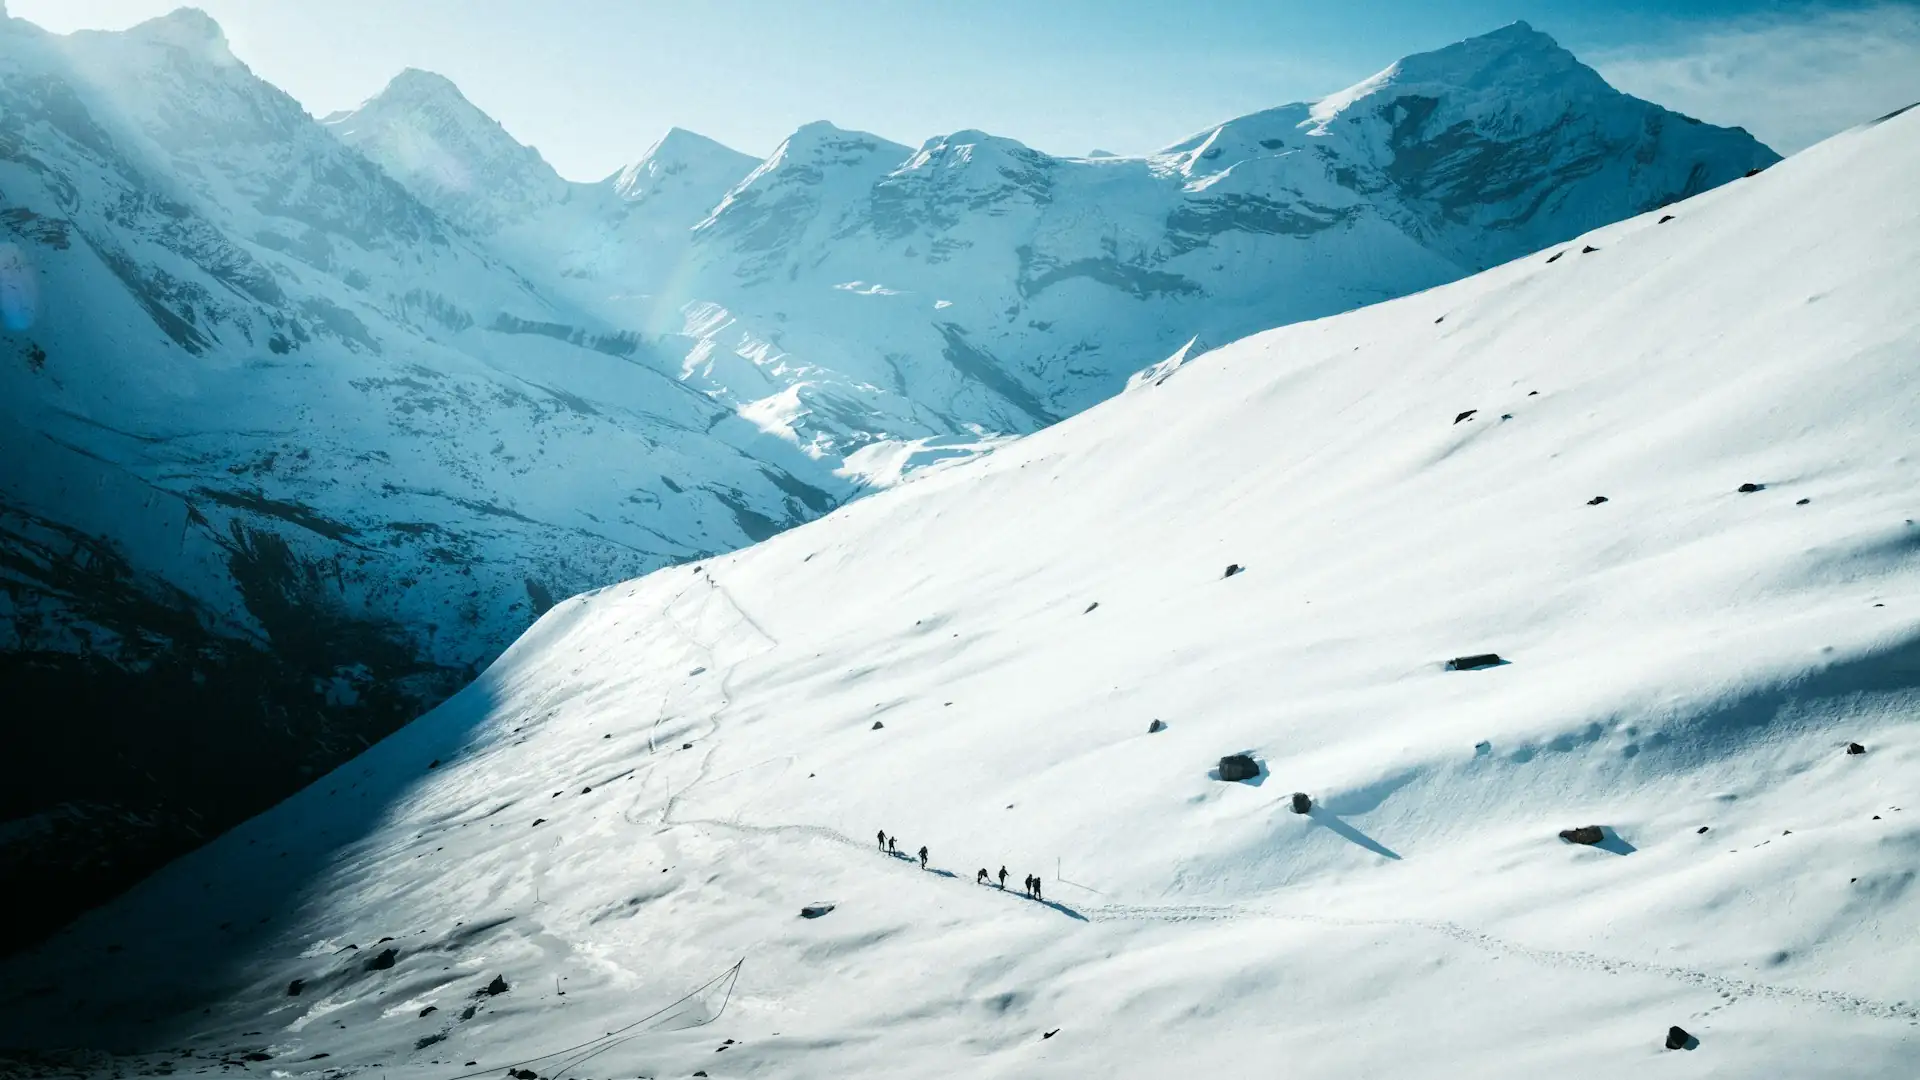
The Annapurna Circuit's map tells a story that most other Nepal treks simply don't: a genuine loop around an entire mountain massif, crossing from one culture and climate into another via a single, mandatory high pass.
Understanding this shape in detail — where the roads have shortened the traditional route, where the real acclimatization work happens, where side trips branch and rejoin, and why the pass functions as the trek's one unavoidable checkpoint — turns a collection of village names and elevation numbers into an actual plan you can trek with confidence.
Whichever variation of this map you choose to walk — the full classic loop, a jeep-supported shortened version, or an extended itinerary woven through Tilicho Lake or Nar Phu Valley — the destination at the center of it all remains the same: 5,416 meters at Thorong La, with Dhaulagiri on one horizon and the whole Mustang valley opening up on the other.